How to Update a 90s Kitchen Without Remodeling: 9 Changes Ranked by Impact per Dollar
Oak cabinets, a fluorescent light box and soffits? Here are nine changes ranked by how much they transform a 90s kitchen for the money, and the order to do them in.
Hoceine
7 min read16 views
In this article
- Which updates give the biggest impact for the money?
- 1. Paint the cabinets
- 2. Swap the hardware
- 3. Replace the fluorescent box and add under-cabinet lights
- 4. Replace or add a backsplash
- 5. Change the faucet
- 6. Remove soffits (only if they're empty)
- 7. Replace the countertops
- 8. Add crown molding to cabinets that stop short of the ceiling
- 9. Repaint the walls
- What order should you do the updates in?
- How do you make a 90s kitchen feel more open?
- See your updated kitchen before spending
- Frequently asked questions
"Just bought this 1990s kitchen. How would you make it feel open for under $8k?" That post on r/kitchenremodel collected hundreds of upvotes and a long list of suggestions. A similar one, "90s cabinets - help!", got even more. The kitchens in those photos look familiar to anyone who has house-hunted lately: honey oak cabinets, almond appliances, a fluorescent box light, soffits above the uppers and a tile or laminate counter.
The good news is that a 90s kitchen usually has solid bones. The cabinets are often real wood, and the layout often works. Most of what dates it is surface.
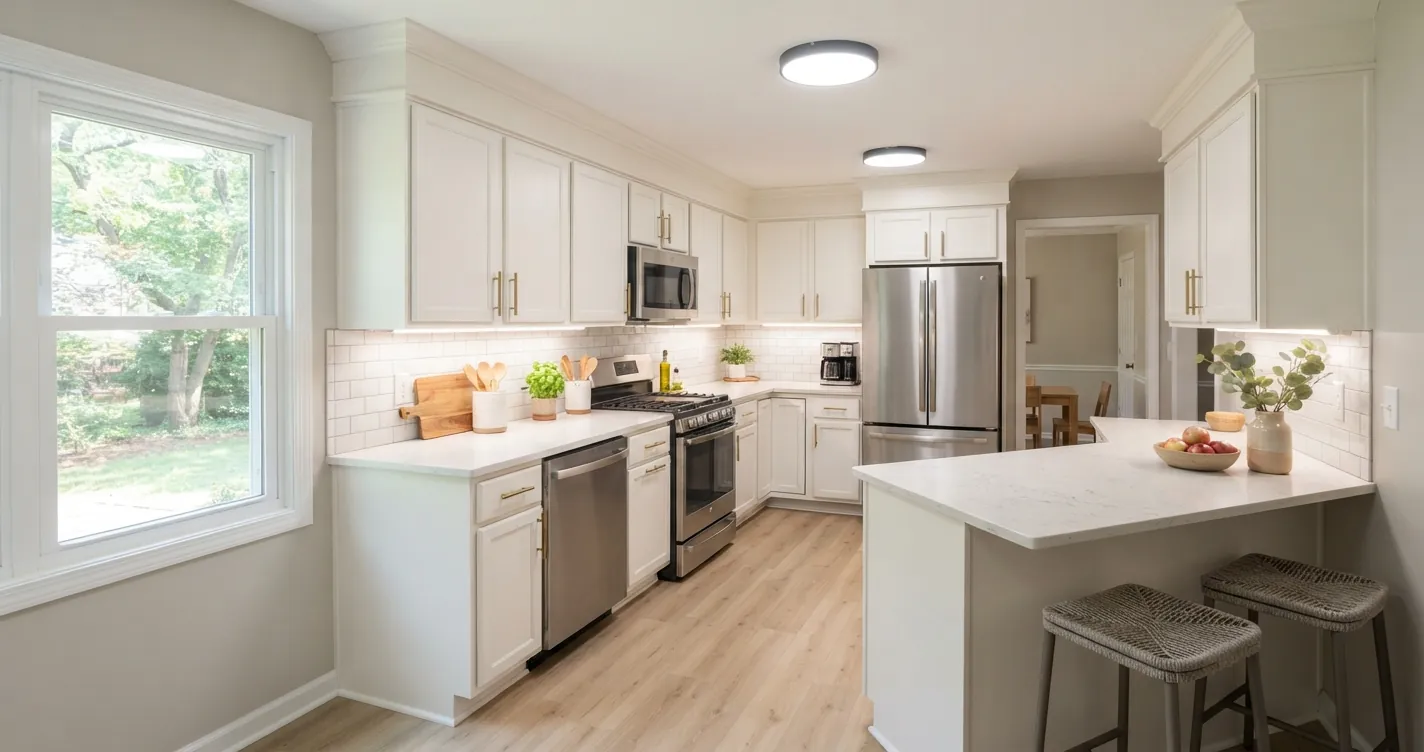
Short answer: for the most change per dollar, paint the cabinets, swap the hardware, and replace the fluorescent box with modern fixtures plus under-cabinet LEDs. Those three can transform a 90s kitchen for a few thousand dollars DIY. Next come the backsplash and faucet. Counters cost the most, so pick them before you choose backsplash or wall color.
Which updates give the biggest impact for the money?
Here's how the common updates compare. Costs are typical US ranges and vary a lot by region, kitchen size and material.
| Rank | Update | Typical cost | Visual impact |
|---|---|---|---|
| 1 | Paint cabinets | ~$300-600 DIY, ~$3k-7k pro | Very high |
| 2 | New hardware | ~$3-10 per pull | High |
| 3 | Lighting (replace fluorescent box, add under-cabinet LED) | A few hundred dollars DIY | High |
| 4 | Backsplash | ~$8-25 per sq ft installed | Medium to high |
| 5 | Faucet | ~$150-400 | Medium |
| 6 | Remove soffits | Varies widely | Medium to high |
| 7 | Countertops | ~$2k-5k for a typical kitchen | High, but costly |
| 8 | Cabinet crown molding | Low hundreds DIY | Medium |
| 9 | Wall paint | ~$100-200 DIY | Low to medium |
If you want your own numbers, the kitchen remodel cost calculator breaks costs down by kitchen size and finish level.
1. Paint the cabinets
Nothing changes a 90s kitchen faster. Oak cabinet boxes are usually sound; it's the orange finish that dates them.
Do it properly: remove doors and hardware, degrease, scuff sand, prime with a bonding or stain-blocking primer (oak grain and tannins show through otherwise), then paint with a cabinet-grade enamel. If you want a smooth look, use a grain filler on oak first; otherwise the grain shows through the paint.
Color directions that work right now: warm white, greige, muted green, deep blue on lowers with white uppers, or a two-tone island. If painting feels like too much, look at refacing (new doors and drawer fronts on existing boxes). The cabinet refacing cost calculator compares it with painting and replacement.
2. Swap the hardware
90s kitchens often have small brass knobs, or no hardware at all. New pulls are inexpensive and change the look in an afternoon. A common rule is to size drawer pulls at about one-third of the drawer width. On a 30-inch drawer, a pull around 10 inches looks right. Use the cabinet hardware size calculator to work through each drawer and door.
If your new pulls don't match the old holes, use a backplate or fill the old holes before painting.
3. Replace the fluorescent box and add under-cabinet lights
That big fluorescent ceiling box is one of the most recognizable 90s features. Swap it for a couple of flush-mount fixtures or recessed lights, and add LED strips or puck lights under the upper cabinets. Under-cabinet lighting lights the counters where you actually work and makes a backsplash look better instantly.
The under-cabinet lighting calculator helps you size strips, and the recessed lighting calculator helps with spacing. Choose 2700K to 3000K for warm, flattering light.
4. Replace or add a backsplash
A plain white or cream subway tile, a handmade-look zellige or a simple slab-look tile instantly updates the room. Wait until counters are chosen so the backsplash coordinates with them. The backsplash calculator estimates tile and materials.
5. Change the faucet
A tall pull-down faucet in a matte black, stainless or brushed brass finish takes about an hour to install and removes another obvious 90s detail.
6. Remove soffits (only if they're empty)
Soffits are the boxed sections above the upper cabinets. Removing them and running cabinets or crown to the ceiling makes the kitchen look taller. But soffits often hide ductwork, plumbing vents or wiring. Cut a small inspection hole first. If something's inside, rerouting it can cost more than the rest of your update combined, and you may be better off painting the soffit the same color as the walls so it disappears.
7. Replace the countertops
Counters usually cost the most on this list, often in the $2k to $5k range for a typical kitchen in laminate-to-quartz territory, more for large kitchens or premium stone. They have a large visual effect, especially if you're replacing tile counters with grout lines or busy speckled granite.
If the budget doesn't stretch, new laminate in a solid or stone-look pattern is a decent short-term option.
8. Add crown molding to cabinets that stop short of the ceiling
Many 90s uppers stop 12 inches or more below the ceiling. Adding a filler board and crown molding on top makes builder cabinets look custom. It's a moderate DIY job with a miter saw and some patience.
9. Repaint the walls
Wall paint ranks last because there's usually very little wall in a kitchen. Choose it last, after cabinets, counters and backsplash are decided, so the walls tie those together.
What order should you do the updates in?
Order matters more than people expect. Doing things out of sequence leads to mismatched colors or redoing work.
- Decide on counters first, even if you install them later. They're the hardest thing to change.
- Pick cabinet color to go with the counters.
- Choose backsplash after counters and cabinets.
- Pick wall color last.
- Electrical (lighting) should happen before backsplash goes up, so wiring for under-cabinet lights can be hidden.
How do you make a 90s kitchen feel more open?
The $8k thread asked about making the kitchen "feel open." A few ways that don't involve moving walls:
- Remove upper cabinets on one wall and add two or three open shelves. You lose storage, so count your cabinet space first.
- Remove a few cabinet doors to make glass-front or open shelving inside existing boxes.
- Lighten the floor. Dark or busy tile makes a kitchen feel closed in. Light LVP or tile in a neutral tone opens it up.
- Paint walls and cabinets in related light tones so the eye doesn't stop at every edge.
- Better lighting. A kitchen with lights in only the center feels small because the corners are dark.
See your updated kitchen before spending
The hardest part of a budget kitchen update is imagining it finished. Will sage cabinets look good with your counters? Will black hardware look too harsh on white?
Take a photo of your kitchen and upload it to the AI room designer with the kitchen room type selected. You can restyle the whole kitchen in different design styles, or use Magic Edit to brush over just the cabinets, counters or backsplash and see up to four options for that one area. It's a quick way to test combinations before buying paint or tile. New accounts get free credits to try it on their own kitchen.
For more budget ideas, see our budget kitchen design guide, and if you're still deciding about the oak, see best paint colors with honey oak.
Frequently asked questions
What is the cheapest way to update a 90s kitchen?
Paint the cabinets yourself, change the hardware and replace the fluorescent ceiling light. Together these often cost well under $1,500 DIY and change the look more than anything else.
Should I paint 90s oak cabinets?
If the boxes are solid and you dislike the orange finish, painting is one of the best-value updates. Use a stain-blocking primer and cabinet enamel so the grain and tannins don't bleed through.
Is it worth removing kitchen soffits?
Only if they're empty. Cut an inspection hole first. If they hide ductwork or plumbing, rerouting it can be expensive, so painting them to match the wall is often the better choice.
What should I update first in a kitchen?
Choose countertops first, even if you install them later, because they're the hardest and most expensive to change. Cabinet color, backsplash and wall paint follow from that choice.